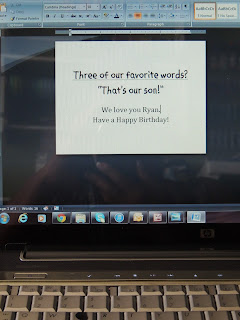
There had to be a better way. Then it dawned on me! I could cut my paper first and then print on it, instead of the other way around. For this card, I needed the white inside piece to be 5" x 3.75". I went into MS Word's page layout and changed my paper size to custom, entered the paper dimensions, changed my margins to 0.5, and typed my perfectly-sized text into my document.
I cut my cardstock to the same size, inserted my paper into the printer, adjusted my paper guides accordingly and printed! Voila! A perfectly sized and typed sentiment!
I used it inside of this slider card (the cut file came from the Silhouette Online store)...
 |
| Bazzill cardstock in white; DCWV Dots, Stripes and Plaids; RYAN sticker and metal dots (really old from my stash); American Craft Alpha rub-ons, |
So today's lesson is this, let your printer do the sizing work for you when making the sentiment panels for the insides of your cards.
- Decide on the size panel you want.
- Go into your word processing software and change the paper size. Adjust your margins if you'd like.
- Cut your cardstock the same size.
- Print!
And that's it!
I want to close by saying that today is my only offspring's 12th birthday. Happy Birthday "Skootch!" aka "Delawoo!"
Thanks for stopping by!
WrinkleFreeDiva!


.jpg)


Nice pic of you and your man child. Hope he had a good day.
ReplyDeleteGreat idea of how to print inside card sentiments. I never printed the inside of the card now I know what to do when I attempt it. The slider card is really cute. TFS!!
ReplyDeleteFab idea. I love to print my sentiments too. Love your card.
ReplyDeleteThanks for sharing that great idea Karen. I will definitely be using it! Great photo of you and your son...cute card! TFS.
ReplyDelete