Pages

Tuesday, December 25, 2012

Keeping My Blog Alive on Christmas Eve

Realizing that it's been awhile since I've posted, I thought I would do a short one today in an attempt to keep my blog alive LOL! So just want to show you what I worked on this month. I actually got bitten by the Christmas spirit bug thanks to Friday Night Challenge with Edie. While I don't ever make Christmas cards to send out en masse, I did manage to make a few for some special people, as well as decorate some Christmas gift bags. At this rate, I might actually get my Christmas letter out before January 1st!

For my Honey-Do

For my step-brother and sis-in-law


Gift bags for co-workers

For my son's teachers
For my parents


There is no lesson today, but as it's Christmas Eve, Merry Christmas to all and to all a good night!


Thursday, November 22, 2012

Don't Be Intimidated...


Last Friday I was not prepared to participate in the Friday Night Chat Challenge over at Scraps of Color, but I was bound and determined to make the Waterfall Card that was one of the challenges issued. The hostess was kind enough to point us to these links here and here. And as complicated as the card looks, it was actually quite simple to make.

When I told my honey-do that I was going to go make a card, he asked me who it was for. I told him “I dunno, I just want to try the technique.” So he said, “I know! You can make a card for my son…his birthday is in eight days. Maybe you can include pictures of his dog!” So off I went to make a Waterfall Card, with a masculine theme and a picture of a dog!

Last Friday I heard a lot of people say that it was really fun to make and actually quite simple. It really was. I had a lot of fun making it although had I taken time to really look at the pictures, I might have used some different patterned paper, but oh well…c’est la vie. I’ll know next time!

And here is my Waterfall Card!


Our simple lesson today is: try not to be intimidated when it comes to trying a new technique. Sometimes, something that looks really difficult really is quite simple. But you won’t know that unless you try! So take a chance, you just might be surprised and have fun while doing it!

Happy Thanksgiving and thanks for looking!!

Friday, November 16, 2012

Reading is Fundamental

When I began this card, I used the sketch over at Jackson's Digital Expressions. I fully intended to enter it in this week's challenge, but after looking at the challenge again, realized that my card was supposed to have a Thanksgiving/Thank You theme. 

The card is actually for one of my sorors who recently adopted three young siblings. When she told us about the impending adoption, she cried tears of joy and thankfulness... so maybe this really is a card that celebrates a giving of thanks…of sorts.

With that said…I think I’m going to post it over there anyway! Seriously, what do I have to lose? Besides, I used a Robert Jackson digital stamp!


So today’s lesson is this: Reading IS Fundamental…but sometimes you can spin things any way you want to! J

Happy Thanksgiving to all of my faithful followers!

Karen

Saturday, November 3, 2012

A Quick Post with a Quick Lesson

In the spirit of not neglecting my blog for too long (and after being inspired to post by looking at several of the blogs I follow) I'm going to do a quick post with some projects completed not too long ago. **There is a quick, but oh so important, little lesson that I just learned today that has nothing to do with this post so make sure to read to the end!**

I hosted Friday Night Challenge over at Scraps of Color on October 12th and the theme was Celebrate the Eight! in commemoration of SOC's 8th birthday. The week-long challenge was to celebrate YOU! Make a layout (single- or double-page) that highlights EIGHT things you love about you! Here is my take on the challenge:


The challenges that Friday night were to:
1)   Make a square card with eight squares on it. (Square cardstock or patterned paper bases do not count as part of the eight squares.) Include one or more stamped images, a sentiment of your choice and some bling.


2)  Create a card using only one piece of plain cardstock to mat your design and at least 8 different patterns and/or colors of washi/decorative tape. Your card base does not count as your piece of cardstock. 


3)  Complete a one- or two-page layout using the following sketch. Use 8 DIFFERENT embellishments on your layout.


Thanks for looking, but don't leave without your quick lesson for today!

DON'T leave new rubber stamps (or old ones for that matter) where the puppy can get to them. They will be rendered useless!

Karen

P.S. Don't forget to vote on Tuesday!

Thursday, September 27, 2012

Sometimes...


…you’ve just gotta let it go and know when to fold.

*As this is a blog about learning (so to speak) I have to post not only the work I’m proud of, but the not- so-nice stuff as well. This is a post about one of those not-so-nice projects!

I began this card in anticipation of entering it for Challenge #23 over at Jackson’s Digital Expressions. *Just so you know, that challenge began on September 18th.* I finished the card… drum roll please… yesterday! Why? Because it became urgent. It’s a card for my BFF whose birthday was September 22nd. She will be arriving on a flight from L.A. in a little over two hours from now and it occurred to me that I should give it to her before her next birthday.

I was thrilled with the card until I stamped the sentiment on the front. Ya know that if you rock your stamp just a little too much, you get that dreaded line from the edge of the stamp. Yep…I got one of those.  I then heat embossed the sentiment and that didn’t come out very well. I think it was the paper’s fault. Then…to camouflauge the “dreaded stamp edge” line, I went over it with Stickles. Didn’t like that, so I covered it *almost* with a strip of rhinestones. Can we just say ughhhhh? By then it was almost 11:30 p.m. and I was tired. Decided to leave it, go to bed, think on it and do something with it in the a.m. Honey asked me if I was going to re-do the card. Ummm…I dunno!

Anyway, we are at 6:25 pm today and you’re probably wondering if I re-did or otherwise doctored the card. Nope, the card is still sitting here with no inside sentiment. So…it’s time for me to end this post and put a sentiment inside before the plane lands. Gonna put some cash in there too which will surely detract from the mishaps on the outside!


So this is what I learned:
  1. Sometimes those little lines from the edge of the stamp aren’t so bad. Leave ‘em be. If you’re giving the card to a good friend, they probably won’t notice anyway and will be grateful that you thought enough of them to make a handmade card.
  2. I am a firm believer in fixing crafty mistakes and not having to start all over. But sometimes, you have to know when you’ve done enough fixing and leave well enough alone!
Thanks for reading and putting up with my mistakes!

Karen

Sunday, September 16, 2012

Scraps and Sticky Ribbons


I got a chance to participate in another Friday Night Challenge over at SOC, this one hosted by our very own Classygirl. We were given three card sketches *y’all know I was ALL over that* and were required to post our creations prior to midnight ET on Sunday. This gave me a little time and breathing room. I was able to get started on Sketch #1 Friday during the chat, but had to leave not too long after to take care of other things.

So, when I came home I threw the sketches (but no paper or cardstock) for the other two cards in my bag *determined to get started on them*, along with about seven or eight layouts in varying degrees of doneness. Even though my crop time was going to be short, due to having to go to a meeting first, I was determined to be productive while I was there.

I did as much as I could with the layouts I had brought with me, and then pulled out the card sketches.  I looked through my layout folders and pulled scraps from several of them. I had gotten this idea from Tiare (Classygirl) who once said that she doesn’t really have scraps because when she finishes a layout, she immediately makes a card(s) from the scraps that are left. I was able to make a good start on laying out the cards and would wait until I got home to add the sentiments and embellishments. Good thing too… cause I took out the clear stamps for the “Happy Thoughts” card and lost the matching sentiment (it says, “are coming your way.”) for the inside. It has to be here on my craft table somewhere but I’ll be darned if I can find it! Grrrrrrrrrrrrrrrrrrrrrr……

While I was at the crop, I got a wonderful idea from one of the ladies there. She works with ribbon a lot and said that she often uses her Xyron to put adhesive on her ribbon. Having tried different kinds of adhesives for ribbon, including the ribbon glue made by Hobby Lobby *it dries out too quickly*, I thought I’d give it a try. I used my trusty Xyron “X” to adhere the ribbon on all three of my cards. The application was so smooth I wondered why I hadn’t tried it before. Thanks for that helpful hint Susan!

Anyway… here are the three cards I submitted for FNC…
Sketch #1 - Used scraps from my drawer and a flower from  Petaloo found at Tuesday Morning.
The ribbon and bling are from my stash.

Sketch #2 - Scraps from layout (coming soon) and flowers from  Petaloo.
The 2-in-1 punch used for the border is from EK Success. Ribbon and fiber from my stash.

Sketch #3 - Scraps from layout (coming soon) and flowers are Color Me Crazy  from Petaloo. Used  Glimmer Mist and Stickles on them as well as pebbles (small flower centers) and the Epiphany Shape Studio for the large epoxy pebble.

My tips for today…
  1. Take your leftover scraps for a layout or other papercrafting project and make one or more cards. Eventually, storage of scraps will cease to be an issue.
  2. Try using the Xyron for ribbon application. Makes ribbon go on nice and smooth.
  3. When using those itty, bitty clear stamps, take out one at a time and put it back when you’re done. Then, hopefully you won’t lose any like I lost mine!

Thanks for visiting… I am Still Young and Croppin’!

Monday, September 3, 2012

Another Entry for "Anything Goes" with Optional Sketch - Challenge #20

Somehow, I managed to get another card completed for the challenge going on over at Jackson's Digital Expressions. 

I used mainly scraps from my drawer and a Robert Jackson digital image, "Courting II." I knew I didn't have  time to color an image if I wanted to submit this by the deadline, so the silhouette image is perfect for this anniversary card.


I did use the provided sketch, but oriented my oval and rectangle differently because of the size and orientation of the image. That's the wonderful thing about sketches; they can be used as a starting point when you're stumped for layout ideas. You can use the chosen sketch as is, or as you progress with your project you may find that it works better if you rotate it, flip it, stretch it, or shrink it to accommodate the elements you're working with. Those who have been following me for awhile know that I am the QUEEN of using sketches 'cause they make my crafty life so much easier! And if you click on the "sketch" or "sketches" labels  here on my blog, you'll find lots of posts referencing them.

So the lesson for today? Sketches!!! *Need I say more?*

Well, today is Labor Day and I must go now and labor on something else!

Thanks for looking!


Sunday, September 2, 2012

Anything Goes" with Optional Sketch - Challenge #20

I swear... I spend more time organizing my craft supplies than I do crafting. This week's organization project was doing something to more adequately store my cricut cartridges to make them easily accessible since MY GYPSY IS DEAD and I refuse to replace it! Last summer Okieladybug made this post about cartridge storage on her blog. I was all ready to go to work and use this storage idea. I even went so far as to buy the Really Useful Boxes. I decided I didn't want to do the work required and ended up returning them a few days later. Fast forward to this week when my friend Helen lit a fire under me and convinced me to do it rather than buy those pricey cartridge storage boxes they sell at Michael's and JoAnn's.  *I would have needed eight or nine of them which would have cost me a pretty penny.* So I bit the bullet, made the little individual boxes and got it done. And it really didn't take me as long as I thought it would. So I said all that to say, that instead of crafting I've been doing more organizational stuff. If I could manage to stop buying crafty stuff, the need to continually organize would probably disappear.

With the help of a simple sketch posted over at Jackson's Digital Expressions, I did manage to make a card  this evening, naturally using scraps out of my scrap drawer. *I will be so glad when they're all used up!* This will be the second time I've participated in a challenge over there.

I've been wanting to use these CTMH sentiment stamps and found that the birthday cake digi stamp in my digital stash would be perfect. The outside reads: "You know you're getting older when..." and the inside reads: "the candles cost more than the cake!"


Quick lesson today: If you quit buying stuff, the need to continually organize will diminish. Less time spent organizing means more time spent crafting. *Ask me how that works out for me in the coming months!"

Thanks for looking!


Friday, August 24, 2012

Anything Goes - Inks and Such Challenge #19


One of my sorority sisters celebrated her 50th birthday this evening and I needed a card. I haven’t colored in a while and so got it in my head that I would do an image for the card that I was making. *All I can say about THAT is that my coloring needs a lot of WORK! I wasn’t 100% pleased with the way it came out, but I didn’t hate it either. Sadly, when you take pics of or scan your work, all the imperfections show up. But I’m gonna keep it movin’!*

Anyway, I decided to use a Robert Jackson image *this one is called Girlfriend* and kind of scraplift a card I had seen on Okie's blog a long time ago.  For the first time ever, I chose my paper BEFORE coloring my image. I must say, that made matching things up much easier. Usually I do the image first, and then try to find paper to match. *For someone like me who is challenged when it comes to choosing paper and matching different patterns and whatnot, that’s just asking for trouble!* Knowing what paper I was going to use made it very easy to go to my Copic Hand Color Chart and choose the right colors.

BTW...This is going to be my first submission ever over at Jackson Digital Expressions for the Anything Goes - Inks and Such Challenge #19!

I had drawn little gold stars in the background, but didn’t like those. My choice was to recolor the image *no time to do that*, cut around the image *wasn’t gonna do that either*, or fix it somehow. I chose option number three and added bling to the stars. Not perfect, but not horrible either.

I used Spellbinders Mega Oval Dies to cut out and emboss my image and the mat behind it. I didn’t realize until now how much I DON’T like the way that particular set of dies nests together. There’s too much space between sizes. So when I put the image in white on top of the mat in green, there was too much space in between and I didn’t like it. I needed something to fill in the space but wasn’t sure what. Then it hit me…fiber! I traced around the image with a pencil, and then using my trusty ATG applied adhesive just inside the line. I placed the fiber on the sticky line, making an oval with it. I had just enough with about an inch left over. And this is the result…

Robert Jackson image, Copics, patterned paper from SEI - Bright Blossom stack, and fiber and scraps from my stash.

Not too bad and the birthday girl loved it! That’s all that matters!

And so, the lesson today is…
  1. Before coloring an image to use on a project, decide on what other papers you will be using first. That will make matching everything up so much easier.
  2.  If you put a project together, and something seems to be missing or not quite right, think about what you have in your stash that will help you to complete a project you will be happy with. You just might be surprised at how it turns out!

Thanks for lookin’!
Karen aka WrinkleFreeDiva

Thursday, August 23, 2012


I needed a quick card for a baby shower. As I am part of the Baby Boomer generation *gasp… I can’t believe I admitted that…* and don’t have any friends or relatives who are of child-bearing age, I don’t have very many baby-related stamps or embellishments.

I remembered a Copic-colored image I had done for an online Copic class. Of course after finishing the image, I made a scan of it to post in the classroom.  It occurred to me that it would be perfect for the card so I printed it out on Bazzill textured cardstock and used the small and large Spellbinders Classic Scalloped Circles to make the mats from scraps in my stash.


Went searching through my scrap drawers for paper that would work *cause of course I don’t have any baby paper either AND I HATE cutting up whole sheets of paper to make a card* and found these old scraps that were a perfect match for the image. It was a double-sided sheet of cardstock from a LSS store that closed over five years ago. I had purchased many sheets of the paper and used it on at least one layout that I could remember. I added a strip of pink paper punched with a border punch, some ribbon and a bow *courtesy of my trusty Bow-Easy*, and three rhinestones.


I don't know about you, but I am still a HUGE novice when it comes to coloring with my Copics *even though I own WAY MORE than a novice should own*. Because I don't color a lot *and therefore don't get very much practice* it takes me FOREVER to color an image to my satisfaction. So when I do, I scan the finished image into my computer for posterity's sake! 

Which brings me to my lesson for today...

When you color an image and think to yourself "WOW! I did an amazing job on that!", scan it into your computer and save it BEFORE adhering it to your project. You never know; it could come in handy when you need a card or other project in a pinch. ***Sidebar: I heard tell of someone who got an order for many  of the exact same card/invitation (something like 15 or more..maybe it was 20+) and was hand-coloring each and every one of them AND this person had a full-time job and family and was staying up until the wee hours of the morning to get this order done. NEVER would I have done that!*** But that's me... jus' sayin!

So with that, I will bid you good-bye for today and as always, I thank you for looking!

Karen aka WrinkleFreeDiva

Wednesday, August 22, 2012

Maximixe Your Crafting Time


A few weeks ago I was chatting with my CFF *Crafty Friends Forever* Sharon S.  over at SOC. She had recently posted a card on her blog where she used spray mists. It was absolutely beautiful! As we were chatting she encouraged me to use my Glimmer Mists of which I have many. So I chose a few colors and began misting away. 

Wanting to get the most out of my “misting experience,” I decided to spray a 12 x 12 sheet of white cardstock and cut it so that I could make four cards. Sadly, I’ve needed quite a few sympathy cards lately, so since I was making one card that was fairly simple in design, I figured it would be just as easy to make four cards that were similar. When I make a card it is usually because I need it for something specific and so haven’t really built up a go-to stash of cards for all ocassions. This is what I came up with:

This card was also used for the Use Your Stash Challenge over at Scraps of Color. 


Most of the paper is from my scrap drawers. For the flowers I used the Insightful Meadows set from the Unity Stamp Co. and the "With Sympathy" stamp is from the Best Wishes set from Close to My Heart. I also used Distress Embossing Ink and Ranger gold embossing powder.

So my lesson for today is this…
  1. If you’re making a card, and taking the time to ink, paint, mist, or stamp a background, why not just make it worth your time and do it on a 12 x 12 sheet of cardstock and net yourself four cards instead of one?
  2. When making cards and time allows, try to make duplicates so that you can build up a stash that you can pull from when you need a card but don’t have time to make one.

Thanks for looking!
Karen aka “WrinkleFreeDiva”

Tuesday, August 21, 2012

Classy Card Sketch Challenge #3


Received an email from Tiare’s blog, iClassyGirl, today with this week’s Classy Card Sketch Challenge. You can check out the challenge and the sketch right here. I am a follower of her blog, but it’s been awhile since I’ve had the opportunity to complete a challenge. Today’s sketch was easy enough and I needed a thank-you card that was long overdue, so I made the card you see below. I only used scraps from my scrap drawers *which led me to begin organizing those…but that’s the subject of another post!* I also used my new washi tape from Indie Chic *they call it decorative tape* and some stud embellishments from Michaels.


Thanks for looking and let me add a footnote here:

One of the reasons that it often takes me so long to update my blog is because when I began this blog journey, I was going to focus on things I learned while working on projects. But sometimes I'm hardheaded and don’t learn nothin’ which creates a sticking point when trying to think about what or how to post about a project. So… just this very moment, I decided that I was going to go with the flow and post as often as possible. If there’s a lesson to be found in that particular project I’ll share it. If not, c’est la vie, and I’ll post anyway!

Karen aka "WrinkleFreeDiva"

Saturday, August 11, 2012

Rubber Stamp Catalog Completed!


After many, many long hours of work, I have finally completed my stamp storage and catalog! And  the best part? I think I will be able to add to and live with this system for a long, long time.

Those of you who are following me will recall my previous post on stamp organization which you can find here. I’m one of those who jump on the latest scrappy organizational craze, and don’t take the time to figure out if that system will work for me. A couple of years ago, I decided to catalog all of my stamps in a rolodex file, and it didn’t take me too long to determine that it really didn’t work for me.

So last month, after acquiring some new stamp storage containers (each one holds LOTS of stamps), I took the opportunity to make a new catalog for my rubber stamps and it all fits in a notebook with lots of room for expansion.

I stamped many of the stamps directly on the pages. In other cases, I just took the pages directly from the rolodex and adhered them to the page (after trimming around them first). When the rolodex pages were double-sided, I photocopied one side first so that I had both images. And finally, for many of the sets, I just used Google to find pictures of the complete set and printed those to adhere to the pages. Each image is labeled with the manufacturer, the name of the stamp, and where it can be found in my stamp files. A-15 would mean the stamp can be found in container A on card 15. 


I’ve had the opportunity to need some stamps recently and finding them is a breeze! Can’t believe I waited so long to do this! What I love most about it is that all of my rubber stamps are shown at their exact size, which means I can see at a glance whether a specific stamp will fit my project or not.

So…for those who have read this far, the lesson today is a simple one:
We papercrafters are always looking for new and better ways to store our stuff. As a consequence, we are always organizing and reorganizing.  Keep in mind that what works for a fellow scrapper may not necessarily work for you. Before deciding on an organizational strategy, think long and hard about your work flow and the space you have. Also consider how much you have of the product (or tools) you’re trying to organize AND whether you’ll be adding to that collection or not. If you are planning to add to your collection of rubber stamps or cutting dies for instance, your organization system will need room to grow or else you’ll end up trying to come up with another organization system.

If you’ve read this far, I hope this has been of some help to you.

Thanks for looking!


Friday, July 20, 2012

Made a Mistake? Don't Despair... Repair!


Sometime last fall, I completed a two-page layout that I wanted to blog about, but didn't since the layout was made as part of a gift album; I had to wait until the recipient received it. By then of course, my focus was directed elsewhere and writing the post had to be put to the side, but for some reason it was never forgotten.

The layout was for baby’s first year, and my intent was to leave mats for photos of the baby each month, with a large mat for the baby’s first birthday. (Knowing me, I probably started with a sketch; but it's been so long, I can't remember.) While doing the mats for months 8 through 11, I made a mistake and stamped those titles above the mats, instead of underneath. If memory serves me correctly, at the time I designed the layout, I intended to put part of the title in that large green space on the left and so stamping above those mats kind of screwed that up. I had already put a lot of work into the layout at that point what with cutting and inking the mats and pasting everything down. Not to mention having very little of the carefully chosen cardstock I'd used left. Besides, I'm really not one to start over when working on a layout. So....I just let the layout "sit" for awhile so that I could figure out how to fix it.


As inspiration began to unfold, I stamped underneath the mats... where the stamping was supposed to be in the first place. 


Then, I decided to add some embellishments in the large green space as well as between the mats to cover up my "boo boos." 


Of course that meant changing the placement of my title while trying to maintain a visual triangle and keep my title grounded. All in all... I was quite happy with the result. And the most important part was, I didn't have to start over!


So... if you've read this far in my post, then you're ready for this take-away:
  1. When working on a layout or other project, don't despair if you make a mistake that you feel can't be corrected. And definitely don't feel like you have to start over!
  2. Allow that project to "rest" for a little while... that could be minutes, hours or even days. Once you feel that the "resting" time is over, look at your project again as if seeing it for the very first time.
  3. Let inspiration guide you and allow your creativity to unfold. While your project may take on an entirely different look or move in a different direction, what results may surprise you!


Friday, July 6, 2012

Rubber Stamp This Organization Idea!


People are always looking for ways to organize their scrappy supplies, and organization for rubber stamps is no exception. Several people have asked me how I organize mine, and so I thought I would do a post on stamp organiztion. I have tried several different ways to organize them, but as crafters you know that as you keep acquiring stuff, your storage needs change. I think I have finally come up with a way to organize AND find them that will grow easily (without requiring a complete overhaul) should I continue to acquire stamps (even though I don’t need to!).

Let me start by saying that I prefer wood-mounted stamps only because I seem to get a much better impression when I use them. I store them in the three-drawer Sterilite drawers. I have twelve drawers all together, and each drawer has two layers of stamps. 


Most of my clear-mount stamps are in these Memorex CD cases that I got from here. They were really inexpensive and seemed like a good idea at the time. The stamps are either on the original plastic they came adhered to, or on those laminated stamp pages that have been cut up. Then those are slipped into each CD sleeve; each case comes with 40 sleeves. However, once you start putting stamps in there, the case will not hold all of the sleeves it came with. This was working for me but the problem is each sleeve does not hold a lot of stamps which sometimes means splitting up sets. They also do not hold very large stamps. 


I have since found these Unmounted Stamp Files by Cropper Hopper (purchased here) and am in the process of transitioning all of my clear- and cling-mount stamps to them. They are quite large and will hold a lot of stamps. They also hold my CTMH stamps in their original plastic envelopes.


A majority of my red cling-mount stamps are on cut up laminated stamp pages and filed in these Sterilite CD boxes which I don't think they make anymore. Each box will only hold about 12 to 15 sheets and the sheets are very small. So I had a hard time getting some of my larger clear and cling mount stamps to fit in there. I did manage to get them in by turning them sideways in the drawer. I’m also going to move those to the Unmounted Stamp Files.


So… I guess you’re wondering HOW I organize them so that I can find them… By size? By theme? By image? Well… none of the above. When I buy stamps they go in the next available CD sleeve, or for the wood-mounted stamps, in a drawer that has space. I have indexed all of my stamps in a rolodex file so that I can find what I am looking for. It is organized into categories. I got this idea over at Split Coast Stampers and spent several days last summer stamping and indexing all of my stamps. If you look at the picture below, you will see the stamp with the hedgehog on the tightrope. On that card, you will see four notations: WM, 5, Penny Black, and Acrobat. The WM means that it is a wood-mounted stamp. The “5” means it is in Drawer 5 where the wood-mounted stamps are. “Penny Black” is the manufacturer/designer and “Acrobat” is the name of the stamp. Drawer numbers begin with “CD” for stamps that are in CD files. For my newer Unmounted Stamp Files, I have decided to label them A, B, C, D, etc and number the cards that are in them.


Now, I supposed I should tell you that after I spent all of the time making the Rolodex file, I don’t really like it. While it is compact and doesn’t take up a lot of room in my craft space, I think I would prefer to see more stamps at one glance. For example… if I’m looking for a “thank you” stamp, I’d like to see many of them at once. It would make selecting one much quicker and I wouldn’t have to spend so much time flipping back and forth in the rolodex file. Another problem with it is that if you want to see the image of larger stamps at actual size, they don’t fit on the cards. So I often had to cut the image from the package, or take a scan of the stamp and shrink it to fit. My background, Rubbernecker and Loralei stamps are a perfect example of stamps that caused me that problem. So… to combat that, I am now in the process of transitioning my index to a notebook with the same categories. At the same time the images for the clear- and cling-mounted stamps will be renumbered to match the new boxes. I can’t tell you how long that’s going to take me, but once that is done, I’ll do another blog post!


Thanks for reading!

Wednesday, July 4, 2012

Declaring My Independence!


***I love being able to follow other people’s blogs by email; makes it easy for me to keep up with what they’re doing. Therefore, I have added that gadget to my blog. I’d love for you to subscribe.

Hey everyone! Happy 4th of July. It has been almost a year since the last time I updated my blog. Same ole song; life got in the way. Really… it did.

The school year was kind of rough. Being a teacher is not like it used to be. It’s summertime, school’s out, so ‘nuff said.

My local chapter of Alpha Kappa Alpha Sorority, Inc. hosted our regional conference here in Phoenix in April. I was chairman of the registration committee which became almost a year long commitment. In the five months leading up to the conference, life shifted into high gear. During that time, I was still the editor for my regional director’s newsletter. Her last issue went to press two weeks ago so my work there is done!

I was diagnosed with multiple nodules on my thyroid last fall and as a result had my thyroid removed on June 4th. Other than my vocal chords (which may prevent me from returning to work next month), my recovery has been good.

I have put my house up for sale and am in the process of packing it up a little at a time. So far, there’s no rush to get my stuff out as the house hasn’t sold yet, and DS and I are already living somewhere else. Which leads me to the biggie…

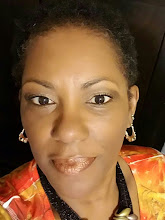
I met and fell in love with a wonderful man, who has made it his life’s mission to take good care of me and my son. He’s warm, funny, loving, sexy, intelligent, talented, athletic and just right for me! (I knew he was a keeper when he wasn’t afraid to go into a scrapbook store on our first date AND paid for my purchases without my asking!) At the end of May, DS and I moved in with him. Prior our moving in, he made me brand-new scrapbook room complete with new paint, hardwood floor, desk top for my cubes, and diecut station (see pics below).  And he lives…. drum roll please…. directly across the street from my parents which makes my DS very, very happy! Life has been phenomenal and all of my cares and woes no longer seem important.

So…. on this day, I’m declaring my independence from:
  • taking on tasks or responsibilities that prevent me from doing the things I love and that bring me joy,
  • worrying about things that I have no control over,
  • worrying about what tomorrow will bring,
  •  negative people and negative situations; and,
  •  unhealthy living.

Thanks for reading and be on the lookout for future, and hopefully regular, blog posts from me!