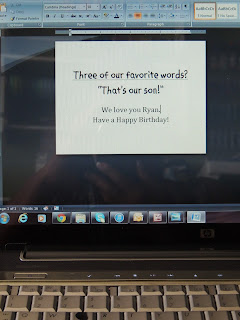
There had to be a better way. Then it dawned on me! I could cut my paper first and then print on it, instead of the other way around. For this card, I needed the white inside piece to be 5" x 3.75". I went into MS Word's page layout and changed my paper size to custom, entered the paper dimensions, changed my margins to 0.5, and typed my perfectly-sized text into my document.
I cut my cardstock to the same size, inserted my paper into the printer, adjusted my paper guides accordingly and printed! Voila! A perfectly sized and typed sentiment!
I used it inside of this slider card (the cut file came from the Silhouette Online store)...
 |
| Bazzill cardstock in white; DCWV Dots, Stripes and Plaids; RYAN sticker and metal dots (really old from my stash); American Craft Alpha rub-ons, |
So today's lesson is this, let your printer do the sizing work for you when making the sentiment panels for the insides of your cards.
- Decide on the size panel you want.
- Go into your word processing software and change the paper size. Adjust your margins if you'd like.
- Cut your cardstock the same size.
- Print!
And that's it!
I want to close by saying that today is my only offspring's 12th birthday. Happy Birthday "Skootch!" aka "Delawoo!"
Thanks for stopping by!
WrinkleFreeDiva!


.jpg)


